Wednesday, December 23, 2009

Comfort Food - Cabernet-Braised Short Ribs

It's not that I haven't been cooking lately, I have. I've been cooking for five actually, which is a huge accomplishment for a girl used to cooking for one or two. Making sure you have enough for everyone and that it all works out mathematically, well, that's not exactly my strong suit.

Earmarking a good recipe, that I can do. Pulling it all together and whipping up a Cabernet reduction, I can do that as well. Math, however...that's another story. Thank god for conversion calculators.

But the point is, I'm here. I've been cooking. I just haven't been getting good pictures. It seems night falls around 3pm here in Portland, and the food never seems to last long enough to get a decent picture. So I can't exactly show you how good the Cabernet-Braised Short Ribs were over Gorgonzola Polenta with a Mixed Herb Gremolata. You'll just have to take my word for it. And, I mean really, doesn't that sound pretty good? Serious winter comfort food. Perfect for when there's freezing fog outside and the rain continues for days on end. Thanks Portland, you really know how to welcome a Californian!

Anyway, it was good. Damn good. And can I tell you something else, something kind of shocking? I'd never made polenta before. Well, not the kind that you add broth to and stir. The "cut a slice off from a tube" Trader Joe's kind I've done. This new-to-me stuff is far superior. Add cheese and cream to it and it was gone in seconds flat. It's a keeper.

Well done self. Family approved meal. Even the 6 year old and the toddler liked it.

Recipes for the Gorgonzola Polenta and Mixed Herb Gremolata meant to be served with this dish will follow this week. No pictures of the final plating, but really, you can't go wrong.


Cabernet-Braised Short Ribs
from Bon Appetit
serves 8

8 lbs short ribs
2 tbs fresh rosemary, chopped
2 tbsp fresh thyme, chopped
1 tbsp kosher salt
1 tbsp freshly ground black pepper
1/4 cup vegetable oil
2 750ml bottles Cabernet Sauvignon
2 tbsp butter, room temp
2 tbsp flour

Season the meat with the salt, pepper, rosemary and thyme overnight before cooking.

Arrange the ribs in a single layer in a 15x10 baking dish. Season with the salt, pepper, rosemary and thyme. Cover and let sit in the refrigerator overnight. Let stand at room temp for 1 hour before continuing.

Preheat the oven to 375. Heat 2 tbsp of vegetable oil in a heavy, wide ovenproof pot over medium-high heat. Working in batches, brown the meat on all sides, about 8 minutes per batch, adding more oil to the pot if needed. Transfer the ribs to a plate, and pour out the drippings in the pan, discard. Add the wine to the pot and bring to a simmer, scrapping up all the brown bits. Return the ribs to the pot; bring to a boil. Cover; transfer to the oven and braise until the meat is very tender, about 2 hours.


Using a slotted spoon, transfer the ribs to a large bowl; cover tightly to keep warm. Skim any fat from the top of the braising liquid. Boil until the liquid is reduced to 2 generous cups. About 20 minutes.

Mix 2 tbsp butter and 2 tbsp flour with a fork in a small bowl until well blended, whisk into the reduced braising liquid over medium-high heat until the sauce thickens, about 2 minutes.

Serve over Gorgonzola Polenta and garnish with Mixed Herb Gremolata.

Thursday, December 17, 2009

From Bouchon - Bouchon's Lemon Tart


I've been lucky enough to have eaten at Thomas Keller's restaurant Bouchon several times in my life. A couple times with my parents when they lived in Napa, and last year for a wonderful Valentines Day lunch, complete with champagne and oysters. It's one of my favorite restaurants, and I've never had anything there that was less than stellar.

On my first visit with my Mother, we ended the meal with a slice of fresh lemon tart. I've never particularly cared for lemon flavored desserts or candy. In fact, I used to remove all traces of it from whatever I was eating. Yellow skittles? Always precisely plucked from the bag before eating the acceptable flavors. Lemon Jolly Ranchers? No thank you. Lemon Bars? Nope. I just never cared for the synthetic flavor, which tasted too overpowering and fake to me.

So I'd never really ventured into the world of fresh lemon desserts. Needless to say, because of that, I didn't exactly have high hopes when the slice of tart at Bouchon hit the table. But, it was Bouchon. And one has to figure that they know what they're doing in a Thomas Keller restaurant. Lemon desserts also happen to be one of my Mother's favorites. I picked up my fork and gingerly took a bite.

It was, to. die. for.

Smooth and tart with just the right amount of sweetness. The crust reminded me of a sable cookie, finely ground and buttery. It was a truly perfect dessert.

Now that I'm home for the holidays, I've been wanting to make a dish for each member of my family, something special. I knew this would be the perfect thing to make for my Mother. I was just hoping I could pull it off, and that it would bare some sort of resemblance to what we had at Bouchon years and years ago.

I have to say, I'm pretty impressed with myself. Well, more impressed with the recipe actually, which, while intricate, was actually quite easy to follow and turned out beautifully. Word to the wise, my six year old niece thought it was a tad too sour, the adults disagreed. I guess I'd now consider this a grown-up dessert. Especially because of the pine nut crust. Don't let that intimidate you or scare you off, this is possibly the greatest tart crust...ever.

There. I said it. Now go make it.


Bouchon's Lemon Tart
serves 9

The recipe for this dough makes enough for 3 tarts, you can freeze two portions for later use.
Sabayon is a light custard like filling.

Pine nut crust

2 cups pine nuts (about 9 ounces)
1/3 cup sugar
3 cups flour
1 cup (2 sticks) unsalted butter, at room temperature
1 egg, lightly beaten
1 teaspoon vanilla extract

Place the pine nuts in a food processor and pulse a few times. Add the sugar and flour and continue to pulse until the nuts are finely ground. Place the nut mixture in a mixing bowl and add the butter, egg and vanilla. Beat with an electric mixer or by hand until thoroughly combined. Next, divide the dough into 3 parts. Wrap each piece in plastic wrap. Freeze 2 pieces for future use and refrigerate the third piece for at least 10 minutes before using.

Heat the oven to 350 degrees. Generously butter and flour a 9-inch fluted tart pan with a removable bottom and refrigerate it while the oven heats. Once the oven has heated, remove the tart pan from the refrigerator and use your fingertips to press the chilled dough over the bottom and up the sides of the pan. Trim off excess.

Bake the crust for 10 to 15 minutes, then rotate the shell and continue baking until golden brown, another 10 to 15 minutes. Remove the shell from the oven while you make the filling. There may be some cracks in the shell. They will not affect the tart.

Lemon sabayon

2 eggs, cold
2 egg yolks, cold
3/4 cup sugar
1/2 cup lemon juice
6 tablespoons butter

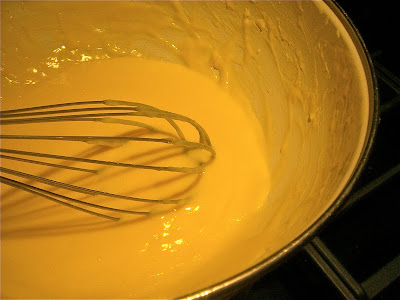
Bring about 1 1/2 inches of water to a boil in a pot that is slightly smaller than the diameter of the mixing bowl you will be using for the sabayon. Meanwhile, in a large metal bowl, whisk the eggs, yolks and sugar until smooth, about 1 minute.

Set the bowl over the pot so that it's not touching the water, and, using a large whisk, whip the mixture while you turn the bowl, for even heating. When the eggs are foamy and have thickened, about 2 minutes, add one-third of the lemon juice. Continue to whisk vigorously and when the mixture thickens again, add another third of the lemon juice. Whisk until the mixture thickens again, then add the remaining lemon juice. Continue whisking vigorously, still turning the bowl, until the mixture is thickened and light in color, and the whisk leaves a trail at the bottom of the bowl. The total cooking time should be about 8 to 10 minutes.


Turn off the heat, but leave the bowl over the water as you add the butter, whisking in, one tablespoon at a time. The sabayon may loosen slightly, but it will thicken and set as it cools.


Pour into the tart shell and place on a baking sheet. Heat the broiler. While the sabayon is still warm, place the tart under the broiler. Leaving the oven door open, brown the top of the sabayon, rotating the tart if necessary for even color, about 20 to 30 seconds. Keep an eye on the tart so it doesn't burn.

Remove the tart from the oven and let it sit at least 1 hour before serving at room temperature or chilled.

Tuesday, December 15, 2009

Homework - Northwood #2


Rain has been pouring down all day. It's in the 30's outside, and a blanket of fog has wrapped itself around everything. Thankfully there's a fire going here, I'm on the couch with a blanket wrapped around me and my laptop screen glowing. I'm looking forward to the hour when I can close the computer and head into the kitchen.

Working from home has it's benefits. There's the working fireplace and the couch, for instance, and the glow of the fire beats the overhead florescents any day. It also doesn't hurt that when cocktail hour rolls around experimentation tends to be pretty easy. The holiday season lends itself to some great cocktails and I've had this one from Bon Appetit bookmarked for awhile. I'm a sucker for anything with apple cider in it. This Thanksgiving I even brined and basted the turkey in it.

Brandy and apple cider in the evening is a staple around this time of year, but this is a great way to mix it up a bit. Tis the season of the holiday cocktail party! Cheers!

Northwood #2
from Bon Appetit
serves 2

3 tbsp gold rum
2 tbsp brandy
1 1/2 tbsp Grade B maple syrup
3/4 tsp lemon juice
ice cubes
2 thin apple slices

Combine rum, brandy, syrup, lemon juice and ice cubes in a cocktails shaker and shake until cold. Strain into two cocktail glasses, garnish with apple slices.


Monday, December 14, 2009

Sweet Tart - Pear & Almond Tart


It may look pretty, but I have to say I'm disappointed in myself. The recipe calls for three pears. I don't know how, but I forgot to add a whole pear to this dessert. There should be six fans of pear in this tart, as you can see, I only have four. I don't have much to say for myself, other than that I've been a tad forgetful as of late. And I can promise you, it would have looked even better with the correct amount of pear.

But I pulled it together last minute, and served the remaining pear as a compote on the side. This dessert was the first thing to disappear from the Thanksgiving dessert table, and I can't think of why it should make a repeat appearance this Christmas. The natives are getting restless. They want this tart.

There are those in my family who are crazy about marzipan. For me, it's become an acquired taste. Years before, I found it too be too sweet and cloying for my taste, now, I realize just how delicious it is as long as it's served with something acidic to offset the sweetness. This tart is a delicious combination. It looks and tastes absolutely festive.

It does requires a good deal of assembly and patience, but as they say, good things come to those who wait. The crust, pears and almond filling can all be made the day before, for easy assembling and baking the day of serving.


Pear & Almond Tart
adapted from Smitten Kitchen and Bon Appetit

Sweet Tart Crust
adapted from Dorie Greenspan
makes enough for one 9-inch tart crust

1 1/2 cups flour
1/2 cup powdered sugar
1/2 tsp salt
1 stick plus 1 tbsp very cold, unsalted butter, cut into small pieces
1 large egg yolk

Combine flour, sugar and salt in the bowl of a food processor and pulse a few times to combine. Add the pieces of butter, scattered through the mixture, and pulse until the mixture is well combined and almost flaky looking. The pieces should be the size of small peas. Stir in the yolk a little at a time, pulsing after each addition. Turn the food processor on for about 10 seconds until the mixture is well combined. Turn the dough out and knead to incorporate any dry ingredients that haven't been added in. Wrap the dough in plastic wrap and chill in the refrigerator for about 2 hours before rolling.

Butter a 9-inch tart pan with a removable bottom. Roll out the chilled dough on a floured piece of parchment paper, lifting and turning while you work to be sure it doesn't stick to the paper. Using the paper, turn the dough over into the tart pan. Peel off the paper and seal any cracks in the dough. Trim off the overhang (should be about 1/2 an inch) and fold the remaining overhang in making the tart sides thicker. Pierce all over with a fork.

Freeze the crust for about half an hour before baking.

Put an oven rack in the center of the oven and preheat the oven to 375. Butter the shiny side of a piece of aluminum foil and press the buttered side down tightly against the crust, smoothing it out to fit the crust. You can now bake the crust without any weights. Bake for 25 minutes.

Remove the foil, if the crust has started to puff it up, gently press it down with the back of a spoon. Bake 5-10 minutes longer, until the crust has turned golden. Don't bake until it takes on a dark color, if that happens the crust will be too hard. Transfer to a rack and cool to room temp.

Pears: you can use either canned or fresh pears for this recipe. If you use canned, be sure to drain and dry them well.

Pears:
4 cups water
1 1/4 cups sugar
1 1/2 tbsp fresh lemon juice
3 medium sized firm but ripe Bosc Pears, peeled

For the Almond Filling:
2/3 cup blanched slivered almonds
1 tbsp flour
7 tbsp sugar
6 tbsp (3/4 stick) unsalted butter, room temp
1 large egg
1/2 tsp almond extract

1 sweet tart shell (recipe above)
powdered sugar for dusting

For the pears: Bring water, sugar and lemon juice to boil in a large saucepan over medium-high heat, stirring until the sugar is dissolved. Add the pears and reduce the heat to medium, simmer until the pears are tender (a fork will pierce them easily) about 20 minutes. Cool the pears in the syrup in the refrigerator.

For the almond filling: Combine the almonds and flour in the a food processor. Mix in the sugar, butter and flavorings. Blend until smooth. Add the egg. Pulse again. Transfer the filling to a bowl, cover and chill for 3 hours. Keep the mixture cold.

Preheat the oven to 350. Spread the almond mixture evenly into the baked tart crust. Remove the stem from the pears and cut each pear in half, lengthwise. Remove the cores. Cut each half crosswise into thin slices, gently press each pear half into fan slices, keeping the slices tightly overlapped. Slide a thin spatula under the pears and arrange on top of the filling, placing the narrow end towards the center of the tart.

Bake tart about 55 minutes until a knife inserted in the center comes out clean. The almond filling should be puffed and golden. Cool the tart in the pan. When it's time to serve, push the bottom of the tart pan up until the tart is released from the pan. Sprinkle with powdered sugar, cut into wedges and serve.

This tart can be made 8 hours in advance. The pears and almond filling can all be made a day in advance.

Thursday, December 10, 2009

Nicholas Kristof - Cancer from the Kitchen Article in the NY Times

Are you putting your plastic containers and tupperware in the dishwasher? Do you microwave food in them? Here's why you shouldn't.

List of Foods to Stay Away From

I worked late last night and arrived home at about 7pm. I was planning on roasting a chicken for dinner, but sadly, my local butcher closes shop at 6:30. I decided to venture into Safeway across the street to see if they had whole chickens. They did, but all they had was Foster Farms, no organic chicken.

Several years ago I noticed that when I ate commercial chicken or eggs I would get sick afterwards. The more research I did, I started to realize that I must be allergic to some of the hormones used. That scared me and really made me think about what I'm ingesting into my body. Since then, I've made an effort to change my eating and buying habits. It's more expensive, but it doesn't make me sick. It's also better for the environment.

I skipped the chicken last night and went with a plain old pasta dish.

With that in mind, when I came across this list of foods created by experts in food safety that they choose to stay away from, I paid attention. I've never even heard about problems with canned tomatoes before. This list is here, and it's worth a read.

Wednesday, December 9, 2009

Handmade - Mini Pumpkin Maple Bourbon Pies

Some people taste something and decide it needs lemon. Sometimes salt. Lately, I often find myself adding one of two things, bourbon or bacon. And at some point soon I am determined to find an occasion to use both at the same time.


Last week Amy extended an invitation to sell some co-handmade good at a Handmade East Bay event (complete with DJ). I readily agreed and we decided the Pepitas Brittle and some mini pumpkin pies would be the perfect items to sell. This meant I had some recipe testing to do. I decided to do the baking on the day of Amber's 30th (she was dutifully studying and attending class that evening, so I offered up pie on a study break).

And so the mini maple bourbon pumpkin pies were born. I cheated on this recipe and used roll out store-bought crusts. The next round I'm going to try a filo dough crust as well. The bourbon isn't too overpowering in this recipe, it's just the smallest hint. These, along with the pepitas brittle, make great holiday gifts.

If you'd care to attend the East Bay Craft Event this Sunday, shoot me an email!


Mini Pumpkin Maple Bourbon Pies
adapted from Bon Appetit
alternatively, will make 1 9inch pie

two store bought pie crusts (use the ones that you can unroll and cut like cookie dough)

2 eggs
3/4 cup half and half
3 tbsp maple syrup
3 tbsp bourbon
3/4 tsp vanilla extract
1 1/2 cups canned pumpkin
6 tbsp packed brown sugar
3 1/2 tsp all purpose flour
1 1/2 tsp pumpkin pie spice
1/2 tsp salt

For mini pies, grease four 5inch tart pans (you can find these at a kitchen supply store, I got mine at Sur La Table) and for a regular pie, one 9inch pie pan. Pre-heat the oven to 400. Put the crust into the pans, line the crust with foil and add dried beans or lentils to weigh the crust down. Bake for 10 minutes. Remove foil and beans, pierce the crusts several times with a fork. Bake 5 more minutes. Remove and cool on racks. Reduce oven to 350.

Whisk eggs and next 3 ingredients in a medium sized bowl. Whisk pumpkin, sugar, flour, spices and salt in another medium bowl; add to the egg mixture whisk until well-blended. Pour filling into the crusts.

Bake the pies until the filling is puffed around the edges and the center jiggles only slightly when the pans are shaken. About 1 hour. Remove and set aside to cool.

Tuesday, December 8, 2009

Make Your Own Luck - Pepitas Brittle


I've been thinking a lot lately about luck. I've been thinking about people who seem to have a talent for things, who are just automatically great at something they do. I wonder if you can ever really be great at anything without some effort put into it. I suppose there are those people, just random anomalies, that step onto the court or up to the task and just have what it takes, without any thought or effort. It seems to be just sheer luck. But honestly, how many people do you know that are able to do that?

Not many, I would imagine. And if you do, they are almost certainly the exception to the rule.

In general, if you want something, you put in the time and the effort. And you keep putting in whatever it takes, as long as you want it enough. You work at things to get better at them. You practice the instrument, you refine your craft. You hone new skills to apply to the things you love. You don't stop learning just because you get comfortable. The minute you stop working, is the minute it starts to slip away into complacency.

How hard should you have to work at something? Should it always be easy? If you have the talent, should it all just come naturally? Personally, I'm always shocked when something comes easy for anyone. It's not the norm, no matter how many people continually expect it to be, and make excuses for things in their lives to compensate for the fact that they just couldn't put in the time and effort. You have to want it. You have to practice. In the end, most often, you tend to make your own luck.

I made my own luck out of my pantry tonight. You know what I like? Recipes with only 3 ingredients. Especially when I already have those 3 ingredients on hand. That's just the best.

Pepitas Brittle
adapted from Gourmet
I'm putting together several bags of this stuff for Christmas presents, so good with ice cream.

1/4 cup water
1/2 cup sugar
1/4 cup pepitas (Mexican pumpkin seeds) toasted

Line a 4 sided pan with foil. Bring water and sugar to a boil in a small light-bottomed saucepan over medium heat, stir until sugar is dissolved. Using a pastry brush dipped in cold water, brush the sugar crystals off the sides of the saucepan. Continue to boil but do not stir, instead, gently swirl the saucepan occasional so that the sugar caramelizes evenly. Continue until the mixture is a golden-amber color, about 10 minutes. Stir in the pepitas and immediately pour over the foil, quickly spreading into a thin disk with a silicon spatula. Cool 5 minutes, then break into pieces.

Monday, December 7, 2009

Bon Appetit - Molly's Sweet Potato Biscuits

I am beside myself with glee every time a new Bon Appetit lands in my mailbox. Joy came this Saturday evening with the December issue, and I am dying to try these Sweet Potato Biscuits from Molly Wizenberg's monthly column, served with good mustard and some holiday ham, there's something to warm and cozy about these, and there's certainly nothing wrong with the smell of biscuits wafting through the house at this time of year.

Get the recipe here.

Wednesday, December 2, 2009

About Delancey - sfgirlbybay interview with Molly from Orangette

Not even two hours later and I'm blogging again. Two of my favorite bloggers have combined forces, Victoria from sfgirlbybay and Molly from Orangette. Victoria has posted an interview with Molly about Delancey, the pizza restaruant in Seattle (Ballard to be exact) that Molly and her husband recently opened. Molly's book, A Homemade Life, is a favorite of mine. A fantastic collection of essays and recipes. I'm dying to get up to Delancey one of these days.

Check out the interview here.

A Short Break


Just a short note, I'm taking a bit of a break for awhile. Postings will come, but will be more infrequent. I'll also share links to other sites. In the meantime, consider this an invitation to send your recipes and food thoughts. Share in the comments or via email. I'd love to see what you're all cooking up.

Tuesday, December 1, 2009

Something Every Cook Should Read

Trolling around on the food blogs today, I came across a David Lebovitz post on TheKitchn called 10 Easy Ways to Improve Your Cooking. Tips involve lots of shallots, good quality chocolate, fresh herbs, upgrading your oils and vinegars, and more. Just wanted to share, I think it's something every home cook should read.

Find it here!