Wednesday, December 23, 2009

Comfort Food - Cabernet-Braised Short Ribs

It's not that I haven't been cooking lately, I have. I've been cooking for five actually, which is a huge accomplishment for a girl used to cooking for one or two. Making sure you have enough for everyone and that it all works out mathematically, well, that's not exactly my strong suit.

Earmarking a good recipe, that I can do. Pulling it all together and whipping up a Cabernet reduction, I can do that as well. Math, however...that's another story. Thank god for conversion calculators.

But the point is, I'm here. I've been cooking. I just haven't been getting good pictures. It seems night falls around 3pm here in Portland, and the food never seems to last long enough to get a decent picture. So I can't exactly show you how good the Cabernet-Braised Short Ribs were over Gorgonzola Polenta with a Mixed Herb Gremolata. You'll just have to take my word for it. And, I mean really, doesn't that sound pretty good? Serious winter comfort food. Perfect for when there's freezing fog outside and the rain continues for days on end. Thanks Portland, you really know how to welcome a Californian!

Anyway, it was good. Damn good. And can I tell you something else, something kind of shocking? I'd never made polenta before. Well, not the kind that you add broth to and stir. The "cut a slice off from a tube" Trader Joe's kind I've done. This new-to-me stuff is far superior. Add cheese and cream to it and it was gone in seconds flat. It's a keeper.

Well done self. Family approved meal. Even the 6 year old and the toddler liked it.

Recipes for the Gorgonzola Polenta and Mixed Herb Gremolata meant to be served with this dish will follow this week. No pictures of the final plating, but really, you can't go wrong.


Cabernet-Braised Short Ribs
from Bon Appetit
serves 8

8 lbs short ribs
2 tbs fresh rosemary, chopped
2 tbsp fresh thyme, chopped
1 tbsp kosher salt
1 tbsp freshly ground black pepper
1/4 cup vegetable oil
2 750ml bottles Cabernet Sauvignon
2 tbsp butter, room temp
2 tbsp flour

Season the meat with the salt, pepper, rosemary and thyme overnight before cooking.

Arrange the ribs in a single layer in a 15x10 baking dish. Season with the salt, pepper, rosemary and thyme. Cover and let sit in the refrigerator overnight. Let stand at room temp for 1 hour before continuing.

Preheat the oven to 375. Heat 2 tbsp of vegetable oil in a heavy, wide ovenproof pot over medium-high heat. Working in batches, brown the meat on all sides, about 8 minutes per batch, adding more oil to the pot if needed. Transfer the ribs to a plate, and pour out the drippings in the pan, discard. Add the wine to the pot and bring to a simmer, scrapping up all the brown bits. Return the ribs to the pot; bring to a boil. Cover; transfer to the oven and braise until the meat is very tender, about 2 hours.


Using a slotted spoon, transfer the ribs to a large bowl; cover tightly to keep warm. Skim any fat from the top of the braising liquid. Boil until the liquid is reduced to 2 generous cups. About 20 minutes.

Mix 2 tbsp butter and 2 tbsp flour with a fork in a small bowl until well blended, whisk into the reduced braising liquid over medium-high heat until the sauce thickens, about 2 minutes.

Serve over Gorgonzola Polenta and garnish with Mixed Herb Gremolata.

Thursday, December 17, 2009

From Bouchon - Bouchon's Lemon Tart


I've been lucky enough to have eaten at Thomas Keller's restaurant Bouchon several times in my life. A couple times with my parents when they lived in Napa, and last year for a wonderful Valentines Day lunch, complete with champagne and oysters. It's one of my favorite restaurants, and I've never had anything there that was less than stellar.

On my first visit with my Mother, we ended the meal with a slice of fresh lemon tart. I've never particularly cared for lemon flavored desserts or candy. In fact, I used to remove all traces of it from whatever I was eating. Yellow skittles? Always precisely plucked from the bag before eating the acceptable flavors. Lemon Jolly Ranchers? No thank you. Lemon Bars? Nope. I just never cared for the synthetic flavor, which tasted too overpowering and fake to me.

So I'd never really ventured into the world of fresh lemon desserts. Needless to say, because of that, I didn't exactly have high hopes when the slice of tart at Bouchon hit the table. But, it was Bouchon. And one has to figure that they know what they're doing in a Thomas Keller restaurant. Lemon desserts also happen to be one of my Mother's favorites. I picked up my fork and gingerly took a bite.

It was, to. die. for.

Smooth and tart with just the right amount of sweetness. The crust reminded me of a sable cookie, finely ground and buttery. It was a truly perfect dessert.

Now that I'm home for the holidays, I've been wanting to make a dish for each member of my family, something special. I knew this would be the perfect thing to make for my Mother. I was just hoping I could pull it off, and that it would bare some sort of resemblance to what we had at Bouchon years and years ago.

I have to say, I'm pretty impressed with myself. Well, more impressed with the recipe actually, which, while intricate, was actually quite easy to follow and turned out beautifully. Word to the wise, my six year old niece thought it was a tad too sour, the adults disagreed. I guess I'd now consider this a grown-up dessert. Especially because of the pine nut crust. Don't let that intimidate you or scare you off, this is possibly the greatest tart crust...ever.

There. I said it. Now go make it.


Bouchon's Lemon Tart
serves 9

The recipe for this dough makes enough for 3 tarts, you can freeze two portions for later use.
Sabayon is a light custard like filling.

Pine nut crust

2 cups pine nuts (about 9 ounces)
1/3 cup sugar
3 cups flour
1 cup (2 sticks) unsalted butter, at room temperature
1 egg, lightly beaten
1 teaspoon vanilla extract

Place the pine nuts in a food processor and pulse a few times. Add the sugar and flour and continue to pulse until the nuts are finely ground. Place the nut mixture in a mixing bowl and add the butter, egg and vanilla. Beat with an electric mixer or by hand until thoroughly combined. Next, divide the dough into 3 parts. Wrap each piece in plastic wrap. Freeze 2 pieces for future use and refrigerate the third piece for at least 10 minutes before using.

Heat the oven to 350 degrees. Generously butter and flour a 9-inch fluted tart pan with a removable bottom and refrigerate it while the oven heats. Once the oven has heated, remove the tart pan from the refrigerator and use your fingertips to press the chilled dough over the bottom and up the sides of the pan. Trim off excess.

Bake the crust for 10 to 15 minutes, then rotate the shell and continue baking until golden brown, another 10 to 15 minutes. Remove the shell from the oven while you make the filling. There may be some cracks in the shell. They will not affect the tart.

Lemon sabayon

2 eggs, cold
2 egg yolks, cold
3/4 cup sugar
1/2 cup lemon juice
6 tablespoons butter

Bring about 1 1/2 inches of water to a boil in a pot that is slightly smaller than the diameter of the mixing bowl you will be using for the sabayon. Meanwhile, in a large metal bowl, whisk the eggs, yolks and sugar until smooth, about 1 minute.

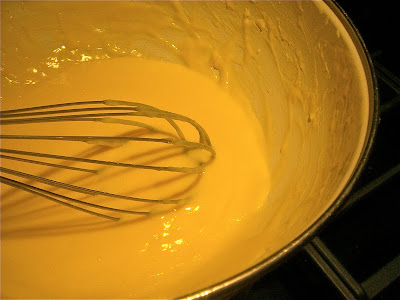
Set the bowl over the pot so that it's not touching the water, and, using a large whisk, whip the mixture while you turn the bowl, for even heating. When the eggs are foamy and have thickened, about 2 minutes, add one-third of the lemon juice. Continue to whisk vigorously and when the mixture thickens again, add another third of the lemon juice. Whisk until the mixture thickens again, then add the remaining lemon juice. Continue whisking vigorously, still turning the bowl, until the mixture is thickened and light in color, and the whisk leaves a trail at the bottom of the bowl. The total cooking time should be about 8 to 10 minutes.


Turn off the heat, but leave the bowl over the water as you add the butter, whisking in, one tablespoon at a time. The sabayon may loosen slightly, but it will thicken and set as it cools.


Pour into the tart shell and place on a baking sheet. Heat the broiler. While the sabayon is still warm, place the tart under the broiler. Leaving the oven door open, brown the top of the sabayon, rotating the tart if necessary for even color, about 20 to 30 seconds. Keep an eye on the tart so it doesn't burn.

Remove the tart from the oven and let it sit at least 1 hour before serving at room temperature or chilled.

Tuesday, December 15, 2009

Homework - Northwood #2


Rain has been pouring down all day. It's in the 30's outside, and a blanket of fog has wrapped itself around everything. Thankfully there's a fire going here, I'm on the couch with a blanket wrapped around me and my laptop screen glowing. I'm looking forward to the hour when I can close the computer and head into the kitchen.

Working from home has it's benefits. There's the working fireplace and the couch, for instance, and the glow of the fire beats the overhead florescents any day. It also doesn't hurt that when cocktail hour rolls around experimentation tends to be pretty easy. The holiday season lends itself to some great cocktails and I've had this one from Bon Appetit bookmarked for awhile. I'm a sucker for anything with apple cider in it. This Thanksgiving I even brined and basted the turkey in it.

Brandy and apple cider in the evening is a staple around this time of year, but this is a great way to mix it up a bit. Tis the season of the holiday cocktail party! Cheers!

Northwood #2
from Bon Appetit
serves 2

3 tbsp gold rum
2 tbsp brandy
1 1/2 tbsp Grade B maple syrup
3/4 tsp lemon juice
ice cubes
2 thin apple slices

Combine rum, brandy, syrup, lemon juice and ice cubes in a cocktails shaker and shake until cold. Strain into two cocktail glasses, garnish with apple slices.


Monday, December 14, 2009

Sweet Tart - Pear & Almond Tart


It may look pretty, but I have to say I'm disappointed in myself. The recipe calls for three pears. I don't know how, but I forgot to add a whole pear to this dessert. There should be six fans of pear in this tart, as you can see, I only have four. I don't have much to say for myself, other than that I've been a tad forgetful as of late. And I can promise you, it would have looked even better with the correct amount of pear.

But I pulled it together last minute, and served the remaining pear as a compote on the side. This dessert was the first thing to disappear from the Thanksgiving dessert table, and I can't think of why it should make a repeat appearance this Christmas. The natives are getting restless. They want this tart.

There are those in my family who are crazy about marzipan. For me, it's become an acquired taste. Years before, I found it too be too sweet and cloying for my taste, now, I realize just how delicious it is as long as it's served with something acidic to offset the sweetness. This tart is a delicious combination. It looks and tastes absolutely festive.

It does requires a good deal of assembly and patience, but as they say, good things come to those who wait. The crust, pears and almond filling can all be made the day before, for easy assembling and baking the day of serving.


Pear & Almond Tart
adapted from Smitten Kitchen and Bon Appetit

Sweet Tart Crust
adapted from Dorie Greenspan
makes enough for one 9-inch tart crust

1 1/2 cups flour
1/2 cup powdered sugar
1/2 tsp salt
1 stick plus 1 tbsp very cold, unsalted butter, cut into small pieces
1 large egg yolk

Combine flour, sugar and salt in the bowl of a food processor and pulse a few times to combine. Add the pieces of butter, scattered through the mixture, and pulse until the mixture is well combined and almost flaky looking. The pieces should be the size of small peas. Stir in the yolk a little at a time, pulsing after each addition. Turn the food processor on for about 10 seconds until the mixture is well combined. Turn the dough out and knead to incorporate any dry ingredients that haven't been added in. Wrap the dough in plastic wrap and chill in the refrigerator for about 2 hours before rolling.

Butter a 9-inch tart pan with a removable bottom. Roll out the chilled dough on a floured piece of parchment paper, lifting and turning while you work to be sure it doesn't stick to the paper. Using the paper, turn the dough over into the tart pan. Peel off the paper and seal any cracks in the dough. Trim off the overhang (should be about 1/2 an inch) and fold the remaining overhang in making the tart sides thicker. Pierce all over with a fork.

Freeze the crust for about half an hour before baking.

Put an oven rack in the center of the oven and preheat the oven to 375. Butter the shiny side of a piece of aluminum foil and press the buttered side down tightly against the crust, smoothing it out to fit the crust. You can now bake the crust without any weights. Bake for 25 minutes.

Remove the foil, if the crust has started to puff it up, gently press it down with the back of a spoon. Bake 5-10 minutes longer, until the crust has turned golden. Don't bake until it takes on a dark color, if that happens the crust will be too hard. Transfer to a rack and cool to room temp.

Pears: you can use either canned or fresh pears for this recipe. If you use canned, be sure to drain and dry them well.

Pears:
4 cups water
1 1/4 cups sugar
1 1/2 tbsp fresh lemon juice
3 medium sized firm but ripe Bosc Pears, peeled

For the Almond Filling:
2/3 cup blanched slivered almonds
1 tbsp flour
7 tbsp sugar
6 tbsp (3/4 stick) unsalted butter, room temp
1 large egg
1/2 tsp almond extract

1 sweet tart shell (recipe above)
powdered sugar for dusting

For the pears: Bring water, sugar and lemon juice to boil in a large saucepan over medium-high heat, stirring until the sugar is dissolved. Add the pears and reduce the heat to medium, simmer until the pears are tender (a fork will pierce them easily) about 20 minutes. Cool the pears in the syrup in the refrigerator.

For the almond filling: Combine the almonds and flour in the a food processor. Mix in the sugar, butter and flavorings. Blend until smooth. Add the egg. Pulse again. Transfer the filling to a bowl, cover and chill for 3 hours. Keep the mixture cold.

Preheat the oven to 350. Spread the almond mixture evenly into the baked tart crust. Remove the stem from the pears and cut each pear in half, lengthwise. Remove the cores. Cut each half crosswise into thin slices, gently press each pear half into fan slices, keeping the slices tightly overlapped. Slide a thin spatula under the pears and arrange on top of the filling, placing the narrow end towards the center of the tart.

Bake tart about 55 minutes until a knife inserted in the center comes out clean. The almond filling should be puffed and golden. Cool the tart in the pan. When it's time to serve, push the bottom of the tart pan up until the tart is released from the pan. Sprinkle with powdered sugar, cut into wedges and serve.

This tart can be made 8 hours in advance. The pears and almond filling can all be made a day in advance.

Thursday, December 10, 2009

Nicholas Kristof - Cancer from the Kitchen Article in the NY Times

Are you putting your plastic containers and tupperware in the dishwasher? Do you microwave food in them? Here's why you shouldn't.

List of Foods to Stay Away From

I worked late last night and arrived home at about 7pm. I was planning on roasting a chicken for dinner, but sadly, my local butcher closes shop at 6:30. I decided to venture into Safeway across the street to see if they had whole chickens. They did, but all they had was Foster Farms, no organic chicken.

Several years ago I noticed that when I ate commercial chicken or eggs I would get sick afterwards. The more research I did, I started to realize that I must be allergic to some of the hormones used. That scared me and really made me think about what I'm ingesting into my body. Since then, I've made an effort to change my eating and buying habits. It's more expensive, but it doesn't make me sick. It's also better for the environment.

I skipped the chicken last night and went with a plain old pasta dish.

With that in mind, when I came across this list of foods created by experts in food safety that they choose to stay away from, I paid attention. I've never even heard about problems with canned tomatoes before. This list is here, and it's worth a read.

Wednesday, December 9, 2009

Handmade - Mini Pumpkin Maple Bourbon Pies

Some people taste something and decide it needs lemon. Sometimes salt. Lately, I often find myself adding one of two things, bourbon or bacon. And at some point soon I am determined to find an occasion to use both at the same time.


Last week Amy extended an invitation to sell some co-handmade good at a Handmade East Bay event (complete with DJ). I readily agreed and we decided the Pepitas Brittle and some mini pumpkin pies would be the perfect items to sell. This meant I had some recipe testing to do. I decided to do the baking on the day of Amber's 30th (she was dutifully studying and attending class that evening, so I offered up pie on a study break).

And so the mini maple bourbon pumpkin pies were born. I cheated on this recipe and used roll out store-bought crusts. The next round I'm going to try a filo dough crust as well. The bourbon isn't too overpowering in this recipe, it's just the smallest hint. These, along with the pepitas brittle, make great holiday gifts.

If you'd care to attend the East Bay Craft Event this Sunday, shoot me an email!


Mini Pumpkin Maple Bourbon Pies
adapted from Bon Appetit
alternatively, will make 1 9inch pie

two store bought pie crusts (use the ones that you can unroll and cut like cookie dough)

2 eggs
3/4 cup half and half
3 tbsp maple syrup
3 tbsp bourbon
3/4 tsp vanilla extract
1 1/2 cups canned pumpkin
6 tbsp packed brown sugar
3 1/2 tsp all purpose flour
1 1/2 tsp pumpkin pie spice
1/2 tsp salt

For mini pies, grease four 5inch tart pans (you can find these at a kitchen supply store, I got mine at Sur La Table) and for a regular pie, one 9inch pie pan. Pre-heat the oven to 400. Put the crust into the pans, line the crust with foil and add dried beans or lentils to weigh the crust down. Bake for 10 minutes. Remove foil and beans, pierce the crusts several times with a fork. Bake 5 more minutes. Remove and cool on racks. Reduce oven to 350.

Whisk eggs and next 3 ingredients in a medium sized bowl. Whisk pumpkin, sugar, flour, spices and salt in another medium bowl; add to the egg mixture whisk until well-blended. Pour filling into the crusts.

Bake the pies until the filling is puffed around the edges and the center jiggles only slightly when the pans are shaken. About 1 hour. Remove and set aside to cool.

Tuesday, December 8, 2009

Make Your Own Luck - Pepitas Brittle


I've been thinking a lot lately about luck. I've been thinking about people who seem to have a talent for things, who are just automatically great at something they do. I wonder if you can ever really be great at anything without some effort put into it. I suppose there are those people, just random anomalies, that step onto the court or up to the task and just have what it takes, without any thought or effort. It seems to be just sheer luck. But honestly, how many people do you know that are able to do that?

Not many, I would imagine. And if you do, they are almost certainly the exception to the rule.

In general, if you want something, you put in the time and the effort. And you keep putting in whatever it takes, as long as you want it enough. You work at things to get better at them. You practice the instrument, you refine your craft. You hone new skills to apply to the things you love. You don't stop learning just because you get comfortable. The minute you stop working, is the minute it starts to slip away into complacency.

How hard should you have to work at something? Should it always be easy? If you have the talent, should it all just come naturally? Personally, I'm always shocked when something comes easy for anyone. It's not the norm, no matter how many people continually expect it to be, and make excuses for things in their lives to compensate for the fact that they just couldn't put in the time and effort. You have to want it. You have to practice. In the end, most often, you tend to make your own luck.

I made my own luck out of my pantry tonight. You know what I like? Recipes with only 3 ingredients. Especially when I already have those 3 ingredients on hand. That's just the best.

Pepitas Brittle
adapted from Gourmet
I'm putting together several bags of this stuff for Christmas presents, so good with ice cream.

1/4 cup water
1/2 cup sugar
1/4 cup pepitas (Mexican pumpkin seeds) toasted

Line a 4 sided pan with foil. Bring water and sugar to a boil in a small light-bottomed saucepan over medium heat, stir until sugar is dissolved. Using a pastry brush dipped in cold water, brush the sugar crystals off the sides of the saucepan. Continue to boil but do not stir, instead, gently swirl the saucepan occasional so that the sugar caramelizes evenly. Continue until the mixture is a golden-amber color, about 10 minutes. Stir in the pepitas and immediately pour over the foil, quickly spreading into a thin disk with a silicon spatula. Cool 5 minutes, then break into pieces.

Monday, December 7, 2009

Bon Appetit - Molly's Sweet Potato Biscuits

I am beside myself with glee every time a new Bon Appetit lands in my mailbox. Joy came this Saturday evening with the December issue, and I am dying to try these Sweet Potato Biscuits from Molly Wizenberg's monthly column, served with good mustard and some holiday ham, there's something to warm and cozy about these, and there's certainly nothing wrong with the smell of biscuits wafting through the house at this time of year.

Get the recipe here.

Wednesday, December 2, 2009

About Delancey - sfgirlbybay interview with Molly from Orangette

Not even two hours later and I'm blogging again. Two of my favorite bloggers have combined forces, Victoria from sfgirlbybay and Molly from Orangette. Victoria has posted an interview with Molly about Delancey, the pizza restaruant in Seattle (Ballard to be exact) that Molly and her husband recently opened. Molly's book, A Homemade Life, is a favorite of mine. A fantastic collection of essays and recipes. I'm dying to get up to Delancey one of these days.

Check out the interview here.

A Short Break


Just a short note, I'm taking a bit of a break for awhile. Postings will come, but will be more infrequent. I'll also share links to other sites. In the meantime, consider this an invitation to send your recipes and food thoughts. Share in the comments or via email. I'd love to see what you're all cooking up.

Tuesday, December 1, 2009

Something Every Cook Should Read

Trolling around on the food blogs today, I came across a David Lebovitz post on TheKitchn called 10 Easy Ways to Improve Your Cooking. Tips involve lots of shallots, good quality chocolate, fresh herbs, upgrading your oils and vinegars, and more. Just wanted to share, I think it's something every home cook should read.

Find it here!

Monday, November 30, 2009

Thankful - Cranberry Pecan Cake


My one year old niece has just recently learned how to say my name. She omits the "E" at the beginning, so it's just "Lissa," but it's the best sound. I couldn't hear it enough. She has about a billion nicknames herself already. We traded them back and forth over the holiday, a sort of call and repeat. Tonight I got to hear it again over the phone. She sounded so happy.

Leaving home was difficult, and I'm having a hard time being back. It's hard to be away from my family, and I wish I could still be home with them all. This time of year makes me miss them all the more, and this year, more than ever, I realize just how thankful I am for them all.

I didn't make this cake for Thanksgiving. I made a pear and almond tart instead that will soon be making an appearance here. This cake is one everyone should have in their repertoire. Calling it a cake isn't totally accurate. It's a bit of a cross between a cake and a tart, maybe even a bread depending on what you cook it in. It's tart, just a bit sweet, spectacular right out of the oven and it tastes like the holidays. I've even had it requested as a birthday cake before. It's one of my favorites, and it's so easy. Just toss all the ingredients together and throw it in the oven. I like to use fresh cranberries, but frozen will work nicely.


Cranberry Pecan Cake

1 cup toasted pecans, chopped
3/4 cup (1 1/2 sticks) butter melted, with a bit extra for the pan
3/4 cup sugar
2 large eggs, lightly beaten
1 tsp almond extract
1 cup flour
2 cups cranberries (fresh or frozen)
raw sugar for topping
zest of 1 orange
whipped cream

Pre-heat oven to 375. Combine pecans through the cranberries in a large mixing bowl. Brush pan with butter. Scoop mixture into a pie pan, tart pan or small baking dish. Bake 30-40 minutes, until knife inserted into the middle comes out clean. Let cool. Top with orange zest and raw sugar. Serve with whipped cream. Also delicious for breakfast.

Tuesday, November 24, 2009

With a Twist - Sauted Brussels Sprouts with Pumpkin Seeds & Lime


A pumpkin pie and a pear and almond tart in the oven, a turkey brined in apple cider, green beans with gremolata, chanterelle mushrooms in butter and white wine, cranberry relish, rolls, mashed potatoes and brussels sprouts in lime with pumpkin seeds.

Actually, that last one was Thursday night's dinner. My friend Diana had mentioned that her fiance had a killer sprout recipe. I'm not one to pass up a killer recipe of any kind, especially not when it involves those delightful little cabbages. Hell to the yes, send it on!

And it was easy as pie. Some brussels sprouts sauteed in olive oil, a little salt and pepper, squeeze some lime on it and you're done! Having been won over last month by brussels sprouts sauteed and then dressed with cream and toasted pine nuts, I knew this could be a winner. But I thought it needed a little something. Enter the toasted pumpkin seeds. Pepitas, a perfect Mexican twist that goes perfectly with the lime.

To be honest, it's not even a recipe. Roughly chop the sprouts, saute them over medium to medium high with a good glug of olive oil, season with salt, pepper and lime, toast some pumpkin seeds and toss them in with the sprouts. That's it. It couldn't be simpler. And when you have some crazy complicated turkey recipe, desserts or whatever you might be serving tomorrow, it's not a bad idea to have at least one dish that is perfect in simplicity. Happy Thanksgiving to you, wherever you are. I hope the food is abundant and delicious, and that the company is just as good.


Monday, November 23, 2009

Before Today - Persimmon Jam


Recently a co-worker of mine mentioned that she had a tree full of persimmons. Trouble was, the tree hangs over her neighbors yard and the fruit inevitably ends up on the wrong side of the fence. She said I was welcome to the persimmons if I brought an apple picker and was able to get to them. I called Leah, and we headed over this morning, apple picker in tow.

At this point I should mention one tiny detail. I don't actually like persimmons. Well, actually, that's not quite correct, I didn't like persimmons before, before today that is. Before today, I'd only ever had them in cookies or in persimmon pudding, neither of which were favorites of mine. The trouble is, persimmons are extremely hard to ignore at this time of year. They seem to be everywhere. It seems there's at least one persimmon tree in everyone's yard, heavy and practically groaning with fruit. The farmer's market is overrun with them. And the thing is, they're so beautiful. You can't help but admire such a exotic looking fruit. I only wished they tasted as good to me as they looked.

My co-worker mentioned she was going to try to make a chutney with them, and on the drive back home I pondered what to do with mine. "Jam!" Leah said.

A good idea. And so that's exactly what I did.

I cut off the tops of each fruit, peeled them, chopped them and removed the cores. I tasted one of the pieces raw, skeptically. No good. Too sweet and just not much going on. I dumped them into a saucepan with some sugar and lemon juice, and turned up the heat. Five minutes later a delicious smell permeated my apartment, and I knew I had something good going on in that pan. Some kind of magical alchemy had occurred and the persimmons had been transformed into something sweet, tart and slightly early. The taste reminded me of fresh apricots. Once the jam was finished, I sterilized a couple jars, ladled in the jam and sealed the jars.

It was so easy to make, I even set aside a couple jars for friends, and one jar will come with me to Portland for Thanksgiving, to be served alongside some cheeses, or to be spread on toast the morning after. But, the best part is now knowing what to do with that gorgeous orange fruit.


Persimmon Jam
makes 2 small jars

5-7 Fuyu persimmons
1/3 cup sugar
juice of 1 lemon

Peel persimmons, remove top and cores. Chop into small pieces. Put persimmons into a medium saucepan with sugar and lemon juice. Turn heat to medium and cook, string occasionally for 25 minutes, until fruit has broken down. Ladle into jars. If you decide not to seal the jars, jam will keep in the refrigerator for 1 week.

Friday, November 20, 2009

Good Intentions - Mediterranean Cocktail


I've had the same hand-me-down coffee maker since my Junior Year of college. It's a Mr. Coffee, and it's served me well throughout the years. It has one of those timers that you can set, so that lo and behold, your coffee is your alarm-clock. I love that coffee maker. It has been a trusty and true companion.

Now, admittedly, it's been a little neglected lately. I hadn't given it a good and thorough cleaning in quite awhile, and recently someone mentioned that it might be time to do that.

The road to hell is paved with good intentions. Where have I heard that before?

I cleaned it. Thoroughly. It is now thoroughly broken.

I am now making my morning coffee with teapot and sieve.

I wish I hadn't cleaned the damn thing so "thoroughly".

You know which saying I like better than the "road to hell one?" The one that goes, "it's cocktail hour somewhere in the world." I say, it's high time for cocktail hour.

When I lived in Ashland, my favorite restaurant was called Pilaf. It was a colorful place with a Mediterranean menu, oilcloth tablecloths and brightly painted walls. It had the best polenta fries, the best falafel, baba ganosh and mango mousse I'd ever had. It was the first place friends would mention when the came to visit, "Can we eat at Pilaf today?" And I was always happy to oblige. They even provided the feast for my graduation party (complete with individual mango mousse's.) One of my favorite things on the menu was the Mediterranean Cooler, a drink made of lemon, lime, sour cherry syrup and rosewater. I'd stop at Pilaf on the way to the Park in the afternoon on a hot day to pick one up and take it with me. It's such a refreshing and delicious drink. And I thought to myself, as I often do, this would go quite well with gin.

So here's my take on a Mediterranean Cocktail. And oh man, is it good! Careful with the rosewater, it's very floral and full of perfume, so just start with a drop or two. To find rosewater and sour cherry syrup, check your local Middle Eastern Market.

The Mediterranean Cocktail
serves 2

juice of 1 lemon
juice of 1 lime
2 shots sparkling water (you can use still if you like)
2 shots Hendricks Gin (or whatever gin you prefer)
2 tsp sour cherry syrup
2 tsp sugar
1/8 - 1/4 tsp. rosewater (start with just a little and add more if you like)
4-5 ice cubes

Combine all ingredients (except for the sparkling water if you use sparkling instead of still!) in a cocktail shaker. Shake till cold. Pour into two chilled glasses, top off with sparking water (again, if you used it) and serve!

Thursday, November 19, 2009

What Makes Sense - Curried Udon Noodles


At least cooking makes sense. At least I know that if I put coconut, ginger, lemongrass and lime together, I'll end up with something I like. I appreciate the certainty of that, when nothing else makes sense and when every other small task seems so pointless and drab, at least there's that.

When disappointment strikes it starts in physicality. I feel heavy and tired, quiet and at a loss for words. I go a bit numb and the world around me starts to blur. There's really nothing to do but sit with it for awhile, to piece through and reflect and regroup as best you can. Everyone needs their own time to deal with it, to mourn and recover, and hopefully when you emerge from that place of recovery, you come out of it with new ideas and realizations about where you're headed and what the opportunities are.

And hopefully by then you've also done several loads of laundry, cleaned the house, watched some sappy movies and worked up a couple of killer recipes.

I've only crossed two of those things off the list so far, care to guess which ones?

It irks me to no end that I can't get a decent picture now that it gets dark so early. Please forgive the photos and the insufficient lighting. Please know that, pictures aside, this is really a great dish. So satisfying and delicious. Everything I like about a Thai style soup; coconut, lime, lemongrass and ginger thrown together with crisp stir-fried vegetables and thick udon noodles. And the best part? It's meant to be slurped up out a big bowl. If you upped the amount of coconut milk and lime, it could be a soup, but I wanted it to be a saucy noodle dish. So, so good.


Curried Udon Noodles

1 tbsp peanut oil
12 ounces fresh udon noodles (or 2 single serving packages)
1/2 package extra firm tofu, cut into cubes
2 carrots, cut into matchsticks
1 red bell pepper, cut into matchsticks
2 baby bok choy, ends trimmed off and discarded, cut lengthwise into ribbons
1/2 cup snow peas
1/3 cup frozen shelled edamame
1/3 cup fresh mushrooms (I used oyster mushrooms) coarsely chopped
4 green onions, chopped diagonally

For the Curry Sauce -
1 cup coconut milk
3 stalks lemongrass
2 tbsp fish sauce
3 limes
1 tbsp sugar
1 tsp curry powder
salt to taste

Trim the stalks of the lemongrass and bruise to release the oils. Remove the outer stalks from the inner core. Mince the core and set aside (should provide about 1 tsp). Cut the stalks in half and place in a saucepan with the fish sauce, juice of 2 limes and the lime rinds. Cook over medium-high heat for 5 minutes. Add the coconut milk, curry, minced lemongrass core, and sugar. Continue to cook while stirring until the mixture is yellow. Remove from heat and salt to taste, set aside.

Heat the peanut oil in a saute pan over medium heat, and bring a pot of water to boil. Add the tofu and stir fry until slightly browned. Add the carrots and mushrooms, stir for a minute more. Next, add bell pepper, edamame and snow peas. Saute until the vegetables are tender and then add bok choy and green onions. Turn off the heat and stir until the bok choy is wilted.

While stir-frying vegetable, cook the udon noodles for about 3 minutes (or according to package directions). Toss noodles in a large bowl with the vegetables, tofu and curried coconut sauce. Salt to taste and serve while warm.

Wednesday, November 18, 2009

Nutella Cake Featured on TheKitchn!


It's the cake that refuses to be ignored, and it's back up on thekitchen!

This is a recipe that I found from Nigella Lawson, and it's more than deserving of a place on your Holiday Table. Check out the recipe here and visit the post on thekitchen here!

Tuesday, November 17, 2009

Thomas Keller's Chocolate Chip Cookies


I'd say this has been a tough week, but it's only Monday. I'd say it's been a tough month, but we're hardly halfway through it. I guess it's just more of a tough time in general.

It's hard to know when to walk away from something you've put time and effort into. Be it a job, a relationship or any life event. It's hard to accept the fact that you've given so much energy and time and still things didn't work out as you'd hoped, and now it's time to move on. How do you do that without regret? How do you feel like your time wasn't completely wasted, and that it was all for nothing?

Those are the times when people like to say things like, "You learned something from all this," or "You do the most growing in times of heartache and change." You hear those kinds of things a lot. And you want to believe it. That you've learned your lesson, that you've gained from the experience and become a better person, but underneath it all, you can't help feeling like you've failed at something.

And people will then say, "Follow your heart. Trust your instincts." And I sometimes wonder what that means, or why if I do understand, it's usually the hardest path to take.

If I step back and think about it all in terms of years and not days and hours, I know that, eventually, it won't be about the little things that carry so much weight in this particular moment in time. Eventually, it won't be about what was said and done, it will be about my own response to all of it. What I did with it and where I chose to go from there.

Because if you didn't learn your lesson the first time, it will come back to haunt you, one way or another in the next job you take, in the next person you love. Those issues will be back, and you'll have nothing but the knowledge that until you make the right choice, you haven't gained anything. Even though it's hard, even though it's scary to feel like you've failed at something again, it has to be better to move forward, to not keep putting things off and living your life at a standstill. Because that would be the real failure. To know things need to change, to know what you need to do and not do it. Like living your life in-between.

And maybe it takes a few times around to really learn your lessons. But once it's done, you won't forget. And when it comes around again you can smile with the recognition and the knowledge that you're done with that one, and you'll hopefully meet the next challenge head on, learning, however hard it may be, not to always run from the fear and the pain, but to sometimes accept it as an opportunity, and to be the person in that time that you'd like to remember and appreciate years later. That's the opportunity. To become the person you want to be in that situation. Even when it's hard. Especially then.

It's a hard time. But I have and will have even more perspective. And cookie dough. And I will always share, both the cookies, and also, what I know to be true now.


This is the second installment in the quest to find the ultimate chocolate chip cookie recipe. So far, after much debate, this seems to have beat out the classic recipe for several of my friends. It's not as sweet as the classic, leaving room to really taste and appreciate the two different kinds of chocolate used. Make of that what you will, and make your own decision. I'm reserving mine until the end. Two more recipes to go!

Thomas Keller's Chocolate Chip Cookies
from the Ad Hoc Cookbook
makes about 30 3-inch cookies

2 1/4 cups plus 1 tbsp all purpose flour
3/4 tsp baking soda
1 tsp kosher salt
5 ounces 55% chocolate, cut into chip-sized pieces (about 1 1/4 cups)
5 ounces 70 to 72% chocolate, cut into chip-sized pieces (about 1 1/4 cups)
1/2 lb (2 sticks) cold butter cut into small pieces
1 cup packed dark brown sugar, preferably molasses sugar
3/4 cup granulated sugar
2 large eggs

Position the oven racks in the lower and upper thirds of the oven and preheat to 350. Use a silpat, or line a baking sheet with parchment.

Sift the flour and baking soda together in a medium bowl, stir in salt. Put the chips in a fine-mesh strainer and shake to remove any of the chocolate "dust" (small fragments).

In a mixing bowl, beat half the butter with a hand held mixer (or kitchen aid) on medium speed until fairly smooth. Add both sugars and the remaining butter, and beat until well combined, then beat for a few minutes, until the mixture is light and creamy. Scrape down the sides of the bowl. Add the eggs one at a time, beating until the first one is incorporated before adding the next and scraping the bowl as necessary. Add the dry ingredients and mix on low speed to combine. Mix in the chocolate.

Fold the dough with a spatula to be sure the chocolate is evenly incorporated. At this point, you can shape the dough into cookies and either refrigerate (well wrapped) for up to 5 days, or freeze for up to 2 weeks. Each cookie should be about 2 tbsp in size. Arrange 8 cookies on each pan leaving about 2 inches of space in between as the dough will spread. Bake for 12 minutes or until the tops are no longer shiny, switching the position and rotating the pans halfway through baking.

Cool the cookies on the pans on racks for about 2 minutes to firm up a bit, then transfer the cookies just to racks to cook completely.

Monday, November 16, 2009

A Familiar Table - Rose's Baked Artichoke Hearts


I have trouble being away from my family on the holidays. I'm pretty spoiled as I've only had to do it a few times in my life. The most recent being a Thanksgiving a couple years back in Ashland with Lauren. We decided to create a feast for just the two of us. Everything from a giant turkey to the green beans, cranberry relish and mashed potatoes to Lauren's Grandmother's famous Ambrosia Salad (the recipe for that involved a box of Dream Whip and terrified me immensely, I shouldn't have been frightened, it was delicious!) We were the two obnoxious last minute shoppers in the grocery store that morning, buying the very last turkey. The process of making said feast ended up including a batch of brandied apple cider and a large bottle of red wine. When we finally took our first ever turkey out of the oven after a lot of "how do we do this?", "is it ready yet" and "is the thing popped out? I don't think it's done till the thing's popped out" the turkey had turned out beautifully. When we finally had everything on the table we were exhausted, full from snacking on cheese and tasting everything throughout the day. We were also very, very tipsy.

We took small bites of each dish, packed the rest up for leftovers and promptly feel asleep. So much for that. It was all delicious, but I gained a certain respect for people who do most of the cooking on Thanksgiving. After spending the entire day in the kitchen, for some reason you can really lose your appetite. I suppose brandy and red wine don't help.

Fortunately, I'll be in Portland with my family this Thanksgiving. A last minute change in plans. It's going to be a full house, with eight, count 'em, eight of my nieces and nephews running around. My Sister's my Mother and I will combine efforts and ovens and turn out the very best buttery Oregon Chantrelle Mushrooms, bright and verdant green beans with white wine and garlic, gingery cranberry relish, mocha pecan pies, pumpkin pies and fluffy rolls, and of course, a huge golden turkey, brined for days and stuffed with citrus.

I'm hoping to play some part in the mashed potatoes process. My Sister and I have a battle every year over the potato issue. She likes to spice things up, add some herbs and garlic. While at any other time of year that might be appropriate, I am firmly in the classic mashed potatoes camp at Thanksgiving. Keep your garlic and rosemary out of there! I like them just the way they are.

There's one dish that I'm particularly excited about. These Baked Artichokes. It's a recipe my sister Erika found a couple years ago in a Martha Stewart Magazine that featured their readers favorite family recipes. It is to die for. Normally nothing can replace my love of mashed potatoes. They're the first things I go looking for around midnight after the big meal, and they constitute breakfast for the next several days. But once these artichokes came around, they took an equal piece of my heart, and now make up half of my Thanksgiving Breakfast Bowl.

It really couldn't be simpler. Frozen artichoke hearts (which can be found at Trader Joe's and other stores) bread crumbs, Parmesan, Pecorino Romano, herbs, lemon juice and olive oil. And as many simple dishes are, mysteriously delicious. It's just the right combination, and it will be one of the first dishes on your Thanksgiving Table to also, mysteriously, disappear.


Rose's Baked Artichoke Hearts

from Martha Stewart Living
Serves 8

1 1/2 cups fresh breadcrumbs
1/4 cup finely chopped fresh curly leaf parsley
2 ounces Parmesan cheese, grated (1/4 cup)
2 ounces Pecorino Romano, grated (1/4 cup)
1 tablespoon mixed dried herbs such as thyme, oregano, and savory, or Italian seasoning blend
1 teaspoon coarse salt
Freshly ground pepper
3 packages (9 ounces each) frozen artichoke hearts, thawed and drained
2/3 cup extra-virgin olive oil, plus more for baking dishes
1/4 cup fresh lemon juice (from 2 lemons)
1 teaspoon finely grated lemon zest
2 garlic cloves, minced (2 teaspoons)
Preheat the oven to 325. Combine breadcrumbs, parsley, cheese, herbs and salt in a bowl and season with pepper.

Brush the insides of two 9 1/2-inch ceramic baking dishes or pie pans (or 1 9 by 13 glass baking dish) with olive oil. Divide the artichoke hearts between the dishes and spread into a single layer.

Sprinkle the breadcrumb mixture over artichokes, pressing down to push into the cracks. Tap bottom of dishes on the counter to settle the mixture.

Whisk oil, lemon juice, zest and garlic in a small bowl. Drizzle the dressing evenly over the breadcrumb topping. Cover dishes with parchment, then foil, and bake for 30 minutes. Increase the heat to 375, uncover and bake until breadcrumbs are golden brown, about 20-25 minutes. Serve immediately.

Friday, November 13, 2009

Finally - Sourdough Bread


Is there anything better than the smell of fresh baked bread? Specifically, freshly baked sourdough bread? No. I think not. This is one of those smells that immediately transports me to my childhood. Actually, it transports me to Buzz's Crabs in Redding, California. I'd go there often with my Mother when she picked up fresh seafood. In addition to the many tanks of live crabs they had fresh sourdough bread, which they took out of the oven a couple times a day. Crusty on the outside, steaming hot and soft on the inside. We'd grab a loaf and tear off chunks of it to snack on the drive home. The smell was always too much to even consider resisting. It's a wonder there was ever any left over for dinner. I loved that ritual, and that's still how I prefer to eat my bread. Torn off in chunks from the freshly baked loaf.

Bread is always best right out of the oven, and I'm still not over the giddy feeling of actually baking it myself, without the aid of a bread maker. My dutch oven has been working overtime for this project. It was finally time to put my sourdough starter to use. It had been brewing for five days and it definitely smelled like sourdough, but the baking was the true test. While the entire process took several days to complete, the results were worth it, and if I keep feeding the sourdough starter, it will keep for weeks. More bread for everyone!

Sourdough Bread
adapted from King Arthur's Flour recipe
makes 1 loaf

1/2 cup sourdough starter
3/4 cup lukewarm water
2 1/2 cups unbleached all purpose flour
1 1/2 teaspoons sugar
1 1/8 teaspoons salt
1/4 teaspoon sour salt (citric acid)

Combine the starter, water and half of the flour. Beat together until smooth. Cover and let rest at room temp for about 4 hours. Then refrigerate overnight for about 12 hours. When the dough is ready, combine the rest of the flour and the other ingredients and knead together to form a smooth dough. Put the dough in a lightly oiled dutch oven or loaf pan and allow the dough to rise once more until it's smoothed out in texture and risen a bit, about 2-4 hours. Towards the end of the rising time, preheat the oven to 425. Spray the loaves with lukewarm water and make two deep horizontal slashes with a serrated bread knife in the top of the loaf. Bake the bread 25-30 minutes until it's a deep golden brown. Remove and let cool on a rack.

Thursday, November 12, 2009

Email Info

Hi All,

Several people have let me know that they're unable to comment on this blog. While I'm not sure why that's the case, I have added an email link on the sidebar to help remedy the situation. So if you have a question, a comment a recipe suggestion or would rather converse in private, just go ahead and email me. I promise to try and return all emails in a timely fashion. Thanks! Carry on.

-Elissa

Skeptic - Pork Tenderloin Stir-Fry with Tangerines & Chili Sauce


Now that the show is open I'm getting back in the swing of things with a more regular schedule. More evenings off means more time to cook and get together with friends. You'd hardly know that based of the infrequency of my posting here. I'll do my best in the coming weeks to post more often. It's such a relief to be able to have the time to get back in the kitchen and to try new recipes that require more than 10-20 minutes. Like being able to take a long breath again, to just relax and enjoy the process. It's amazing how cooking has become such a stress-reducer for me. I sometimes wonder if it would stay that way if I actually did it for a living. Would I enjoy it as much? Would I come to resent it? Or would it just continue to make me happy? Cooking and sharing with others. I love both the familiarity and the experimentation, the endless combination and new riffs. Seeing a new technique or coming across a pairing I'd never even considered, those things now seem to jump off a page or website like an exclamation mark.

This is one of those dishes that just struck me as so weird and interesting while also quick and simple, I really couldn't pass it up. It's unique in that you saute the tangerines peel and all. You eat it that way as well. Once they hit the heat, the peels become tender and less bitter. Daniel looked at me with a healthy amount of skepticism once he saw the recipe I had stealthily tried to shield from his prying eyes. He voiced his concern and then sat back, waiting to be proven right. In the end, he ate both his words and skepticism. Both he and his roommate pronounced the dish a winner. Though I did notice that his tangerine peels remained untouched. I thought they were great.

A word of caution, I couldn't find sweet chili sauce. I got plain old chili sauce instead, and it made a huge difference in the spice level. Be sure to taste it before you combine it so you can determine your own comfort zone with the spice. While Daniel loved it, I had tears streaming down my face. Very tasty, but VERY spicy, and I didn't even use the whole 1/4 cup it called for.


Pork Tenderloin Stir-Fry with Tangerines & Chili Sauce
from Bon Appetit, November 2009
serves 4

1 1/4 lb pork tenderloin, trimmed and cut crosswise into 1/2 inch thick rounds, the sliced into 1/2 inch strips
1 tbsp cornstarch
salt & pepper for seasoning
2 tbsp sesame oil, divided
1 tbsp peeled & minced fresh ginger
2 cloves garlic, minced
4 small unpeeled tangerines, cut into 3/4 inch slices (keep peel on)
1/4 cup sweet asian chili sauce
2 tbsp soy sauce
1/4 tsp chinese five-spice powder
6 baby bok choy, ends trimmed and discarded, sliced crosswise into 1 inch ribbons
5 green onions, sliced thinly on the diagonal

Toss the pork tenderloin strips with salt & pepper for seasoning, add the conrstarch and toss to coat. Heat 1 tbsp sesame oil in a non-stick saute pan over medium heat. Add the ginger and garlic, saute for 30 seconds. Add the pork and stir fry till pork starts to brown and is almost cooked through, about 3 minutes. Add tangerines and cook while tossing about 30 seconds, then add chili sauce, five-spice powder and soy sauce. Toss to coat. Boil until sauce thickens slightly, about 1 minute. Add remaining sesame oil, bok choy and half the green onions. Stir fry until bok choy is wilted, about 1-2 minutes more. Season to taste with salt and pepper, transfer to a serving platter and top with the remaining green onions. Serve over rice.

Monday, November 9, 2009

Feeling Fall - Homemade Ricotta on Toast with Persimmon, Hazelnuts & Honey


As much as I love my Sunday Farmer's Market, it's not a one stop shop kind of place. Today I needed to stock up on some basic pantry staples, and after enjoying sleeping in for the first time in recent memory, it was a bit too late to hit the market. I decided Berkeley Bowl would be my best bet for the basics and good produce. Berkeley Bowl is something of a legend in the Bay Area. As the name suggests, it used to be a bowling alley, now it's aisles are stocked with gorgeous produce and hard to find spices, cheeses and other items. A word of caution, however, Berkeley Bowl is an enter at your own risk kind of place. Once you're in, it's every man for himself. The lines are ridiculously long and every Berkeley hippie with dreds and a patchouli fetish is wielding a shopping cart and not afraid to run over your foot or ram you with it. It can be an unpleasant experience, and it can take forever, but mostly, the goods are worth it.

Among the items in my basket were a package of cheesecloth and a large glass bottle of Strauss Family Creamery Whole Milk. Strauss milk is a luxury item in my house, but today I was making my first attempt at homemade ricotta, so I wanted to use the best ingredients possible. I grabbed a couple of beautiful flaming orange fuyu persimmons as well.

The ricotta couldn't have been easier to make. I couldn't believe how quickly it came together, and with only three ingredients no less. So much tastier than buying a carton from the store. I'm so excited with the results. I spread it on a slice of sourdough I'd baked the day before, added some toasted hazelnuts, a couple slices of persimmon and drizzled some honey over that. A perfect autumn breakfast.

Ricotta and instructions have been all over the blogosphere lately, but I'm adding mine to the pile. The whole process takes about 10 minutes. Go ahead, give it a try!


Homemade Ricotta
adapted from Bon Appetit
makes about 1 cup

4 cups whole milk
1/2 tsp salt
1 1/2 tbsp fresh lemon juice

Line a colander with 4 layers of cheesecloth. Heat milk and salt in a saucepan over medium heat until just simmering. Stir in the lemon juice. Curds will start to form, continue to simmer for 1-2 minutes. Next, using a slotted spoon or skimmer, remove the curds from the liquid, and transfer to a cheesecloth lined colander. Let the cheese drain for about 1 minutes. Don't drain it for any longer than that, or your cheese will be too dry. Transfer to a bowl and chill in the refrigerator for 1 hour. Keep chilled. Cheese will keep 2-3 days in the refrigerator.

Friday, November 6, 2009

Rushing - Linguine with Tuna, Cherry Tomatoes & Herbs


It took about 20 minutes to sneak a little cooking into the schedule tonight. Well, hardly cooking. Opening a can, boiling some water for pasta, throwing some things into a saute pan and running my knife through a handful of herbs. But it felt so good. I'm so excited to have some time this weekend to finally delve into my new Ad Hoc cookbook. I woke up the other morning to the sounds of "mmmm...." coming from the chair Daniel occupied after getting up early for coffee. He was thumbing through the pages and lingering on the photographs. The leek bread pudding seemed to catch his eye. I myself still have my heart set on the chocolate chip cookie recipe.

So after 20 minutes of "cooking" tonight, and 10 minutes of shoving it into my mouth, I rushed off to the theatre. Tonight was our first night in front of an audience. It was an impressive crowd. It's always a bit of a revelation to see what happens to a show once it has an audience. To find the laughs and feel the energy. As a cast, we were relieved to finally feel what it was like with this show. To hear the first collective laugh is always a bit of a rush, not to mention totally addictive.

So, just two more nights of rushed dinners and leftover lunches for now. Thanks to my friend Denise in Ireland (and Happy Anniversary by the way!) for the Monkfish recipe suggestion, which I'm dying to try. And as I said, suggestions are welcome! This show runs for five more weeks and this girl needs ideas!

This is a great, quick recipe. Don't skimp on the herbs, there should be a ton. They really brighten the flavor of this dish.

Linguine with Tuna, Cherry Tomatoes & Herbs

1/2 lb linguine, cooked according to package directions
1 can Italian tuna packed in olive oil (the quality of tuna makes a huge difference in this recipe, so spring for the good stuff!)
1 cup cherry tomatoes
1/3 cup chopped mint
1/3 cup chopped basil
1/3 cup chopped flat leaf parsley
2 tbsp olive oil
1 large shallot, thinly sliced
1 clove garlic, minced
1 tbsp red wine vinegar
Parmesan for serving
salt and pepper to taste

Boil water and cook the pasta. Heat olive oil in a saute pan over medium heat. Saute the shallots until tender and translucent. Add the garlic and saute a minute more. Add tuna and tomatoes, turn up the heat and saute about 3-4 minutes more. Add pasta to the tuna mixture and toss with herbs, vinegar and salt and pepper. Serve with Parmesan.

Tuesday, November 3, 2009

Going Up - Ginger Chicken Soup


As an actor onstage, the absolute worst thing that can happen to you is to either miss your cue or "go up" on your lines, meaning to forget them completely. There is nothing more terrifying than this prospect. It strikes fear in the heart of every actor, and each can give you their own personal horror story of when their number was up. How long those seconds seemed to stretch out across time, how terrified their co-actor looked across stage realizing what was happening and being unable to help them through it. How quiet the audience got, and seriously, how those 10 seconds seemed like hours.

Tonight, my number was up. Luckily it was a dress rehearsal and there were only a few donors in the audience, but nonetheless, it was certainly the worst bout of forgetfulness I've ever had onstage, and it was simultaneously mortifying, frustrating and terrifying. There were no words, none, just some sputtering and gasping, "buh...gah...eh...uhhhh....." and then there was silence. When the words came, they were not the lines I should have been speaking. I simply couldn't get back on track. This went on for about 30 seconds. Or basically eternity. Luckily my fellow actor was able to step up quicker than I was. She saved the scene.

I've never been so glad to get off stage. Not even when I had the stomach flu during a high school musical. Buckets waiting in the wings and all.

Generally you have to have at least one bad dress rehearsal to feel really good about a show. I don't know why, it's one of those old theatre superstitions. Let's hope to god this will do it for me. Because that sucked.

So I came home and made comfort food. Ginger Chicken Soup and Sourdough Bread. I wanted something homey, but with a fragrant twist. When I couldn't find just the right recipe, I improvised. I have to say, I'm pretty excited about the results.

Hey, if I can't improvise on stage, at least I can do it in the kitchen.

Ginger Chicken Soup

adapted from Real Simple

2 tbsp olive oil
1 5-inch piece fresh ginger, minced (3 tablespoons)
4 garlic cloves, minced
1 small red onion, chopped
1 large parsnip, peeled and chopped
1 medium turnip, peeled and chopped
3 medium carrots, peeled and chopped
1/2 lb fingerling potatoes
2 32-ounce boxes low-sodium chicken broth (8 cups)
1/2 cup rice wine vinegar
2 tsp hot sauce
1/2 teaspoon kosher salt
1/2 rotisserie chicken, meat shredded (2 cups)
1/3 cup frozen shelled edamame, thawed
3 scallions, trimmed and sliced

In a large saucepan or stockpot, heat the oil over medium heat. Add the ginger, garlic, and onion and cook, stirring occasionally, for 2 minutes. Add the parsnips, turnip, carrots, potatoes, broth, and salt and bring to a boil. Simmer, covered, until the vegetables are tender, 15 to 20 minutes.
Add the chicken, cover, and cook for 5 minutes. Remove from heat, stir in the edamame and scallions, and let sit, covered, for 1 minute.